|
|
|
|
|
|
|
|
|
|
|
Maintained and designed by Shiroh©
|
|

|
|
The site with something for everyone
|
|
|
|
Tutorials> Building a web page: Images
|
|
|
Images: an Introduction
Images are one of the most popular components of a web page and can
add colour and creativity to any the presentation.
There are two main types of images that can be placed on a web page.
- Those in the GIF Format
- Those in the JPG or JPEG Format
The GIF format allows images to be view in only 256 colors while the JPG/JPEG format
allows for more colors. The number of colors used is directly related to the size of the
format thus GIF images are usually smaller in size (in terms of bytes). The problem with using
images is that they slow the rate at which your page loads into your browser thus it is
important to carefully choose the number and size of the images that you use.
|
|
|
The Tag
The tag used to insert images onto a page is the <IMG> tag.
The properties of this tag are as follows:
- SRC - this specifies the location of the image to be displayed. It typically looks like
- <IMG SRC="http://shiroh.iwarp.com/images/image1.jpg"> or
- <IMG SRC="images/image1.jpg">
The first example uses an absolute url, that is it shows the exact location of the image, this is useful when the
image is stored in a server other than the one that contains the actual html page.(NOTE:Many images are copyrighted and
using images without permission of the owner can be a prosecutable crime so please get all necessary permissions first!)
The second example uses a relative url, that is it shows the location of the image relative to the directory
where the html page is stored and thus shows that the image is stored on the same server as the html page. I recommend using the second scheme because
some servers prevent files from being called by absolute urls.
- ALT - this is text that would replace the image while it is loading or if it cannot be loaded.
This is helpful for users who do not allow images to be loaded.
- ALIGN - images in HTML can be inline or floating images, this tag defines how the image is place with respect to text on the page
There are five main values that this attribute can take, these are as follows
- top - this is for inline images and aligns the text starting at the top of the image.
For example:
 This is an example of using top This is an example of using top
The code looks like this:
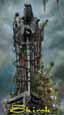
<IMG SRC="../../images/warrior.jpg" ALT="Shiroh's Warrior Image" ALIGN="top">This is an example of using <font COLOR="#7BDDFD">top</FONT>
- middle - this aligns the text at the middle of the image.
For example:
This is an example of using middle
The code looks like this:
<IMG SRC="../../images/warrior.jpg" ALT="Shiroh's Warrior Image" ALIGN="middle">This is an example of using <font COLOR="#7BDDFD">middle</FONT>
- bottom - Who can guess what this one does? Yes, it aligns the text at the bottom of the image.
For example:
This is an example of using bottom
The code looks like this:
<IMG SRC="../../images/warrior.jpg" ALT="Shiroh's Warrior Image" ALIGN="bottom">This is an example of using <font COLOR="#7BDDFD">bottom</FONT>
- right - This is used for floating images,it aligns the the image to the right of the text.
For example:
This is an example of using right.
The code looks like this:
<IMG SRC="../../images/warrior.jpg" ALT="Shiroh's Warrior Image" ALIGN="bottom">This is an example of using <font COLOR="#7BDDFD">right</FONT>
Notice that I placed the IMG tag before the text but the image still appeared on the right of the text.
This is important because HTML usually goes inline, that is it displays what it sees in the order from top to bottom! This is
why using these values for ALIGN give the feel that the images are "floating".
- left - this is the default value and aligns the image to the left of the text.
For example:
This is an example of using left
The code looks like this:
<IMG SRC="../../images/warrior.jpg" ALT="Shiroh's Warrior Image" ALIGN="middle">This is an example of using <font COLOR="#7BDDFD">middle</FONT>
- WIDTH and HEIGHT - These attributes may confuse some people, this only sets the display width and height of the image
and does not affect how long it takes to load.
- WIDTH - this sets the width of the image, by setting this attribute alone and not the height attribute
the image is resized to the same proportions as the original image. That is it maintains it's original width/height ratio.
For Example:
The code looks like this:
<IMG SRC="../../images/warrior.jpg" ALT="Shiroh's Warrior Image" WIDTH="80">
- HEIGHT - This works the same way as the width attribute
For Example:
The code looks like this:
<IMG SRC="../../images/warrior.jpg" ALT="Shiroh's Warrior Image" HEIGHT="80">
- Setting both - allows you to resize the image to any desired proportions
For Example:
The code looks like this:
<IMG SRC="../../images/warrior.jpg" ALT="Shiroh's Warrior Image" WIDTH="120" HEIGHT="80">
Looks funny doesn't it!
|
|
|
Time to experiment
Try placing an image on your homepage. It is important that you have an image on the server where you are hosting your web page, there
should be a utility there for you to upload images.
You can click here to see an example.
|
|
|
How do I create links? Next.....Putting the Hyper in HyperText
|
|
|
|
|
|


